
Hairpin lace is a beautiful technique but it can be very daunting for a beginner (turn the loom how??). This tutorial will walk you through how to make hairpin lace from creating a strip of hairpin lace to joining strips together – step by step. You can also check out the video, which can make it a lot easier to see how to move the hook and how to turn the hairpin lace loom to form a strip!
*Disclosure: Some of the links in this post are affiliate links, which means if you click on them and make a purchase I may, at no additional cost to you, earn a commission. Read full disclosure here.
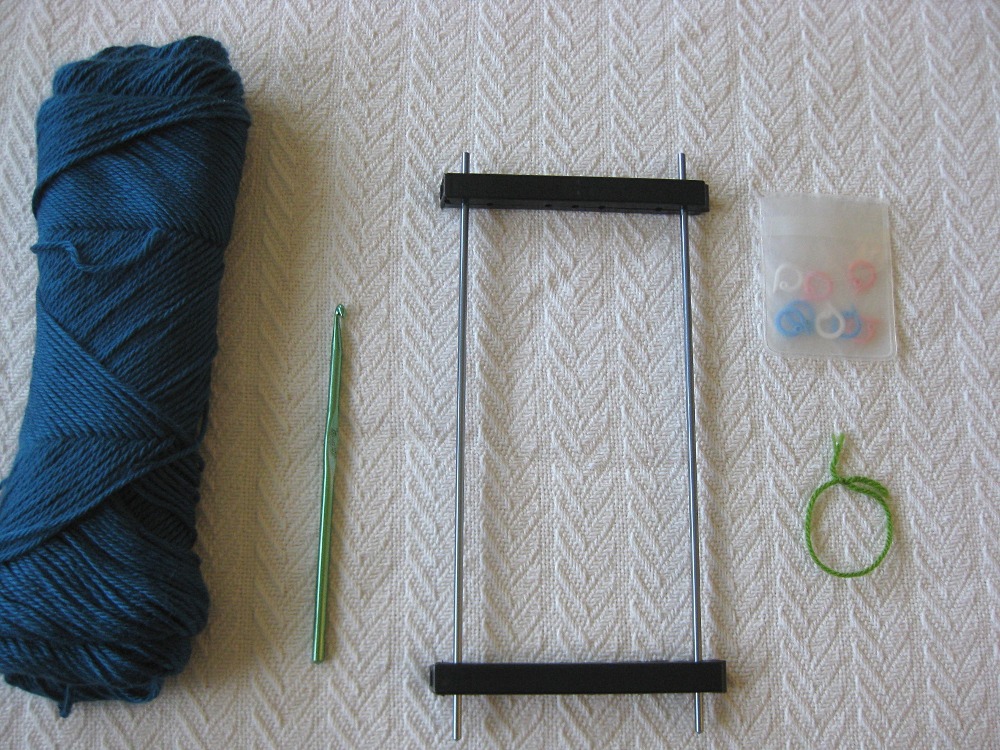
Here’s what you need:
- Hairpin Lace Loom (available at most craft stores or online)
- Yarn specified by your pattern (here, Caron Simply Soft)
- Crochet hook specified by your pattern (here, an H hook)
- Stitch markers or loops of yarn in a contrasting color
Before we get started – a note about hairpin lace looms. They come in a few varieties. Most often the top and bottom bars can slide off but you may have one (like the one pictured here) that has clip-on top and bottom bars. There are a variety of holes you can use to put your long bars in to form strips of lace of varying sizes. In most of the tutorial pictures shown, the bars are on the widest possible setting so it’s easy to see what’s going on. However, when I join the strips of lace, the strips were made using a smaller inter-bar distance. If you make the strips wider, the weave will be a little looser when you join the strips together, but it works the same (if you want a tighter fabric with wider strips, you can use more loops at a time when you weave the fabric together). If you have a pattern that calls for a strip of a specific width, use a measuring tape to measure between the holes in the bars and choose whichever ones are closest to the desired size (to be very precise, measure to the outsides of the holes, which is where the yarn will be wrapped).
Okay, let’s get started!
Creating a Strip of Hairpin Lace
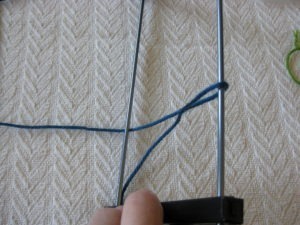
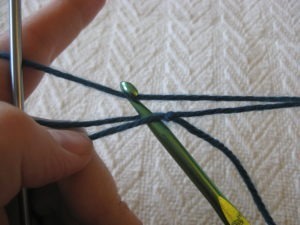
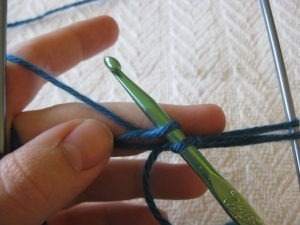
Tie a slip-knot in your yarn (leaving a good long tail for weaving in at the end). Take the bottom bar off of your loom and loop the slipknot over the bar. The knot should be centered between the two bars. For a right-handed person (all of these pictures are taken right-handed), the loop should be on the right bar, and the yarn underneath the left bar. Put the bottom bar back on your hairpin lace loom.


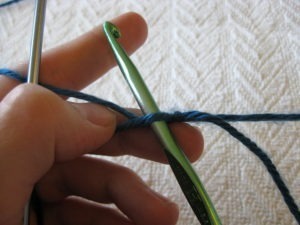
Lifting the right side of the loom, turn the loom over. The initial loop should now be on the left side, with the yarn wrapped around the bar on the right. Hold the yarn as you normally would for crocheting, while holding the loom in your left hand.
Insert your crochet hook through the loop, hook the yarn and pull through, yarn over and pull through again to form your first stitch.
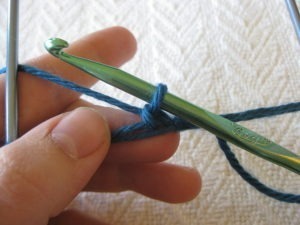
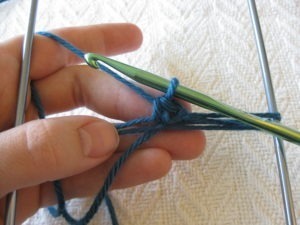
To prepare for the next stitch, turn your crochet hook so the hook is facing down.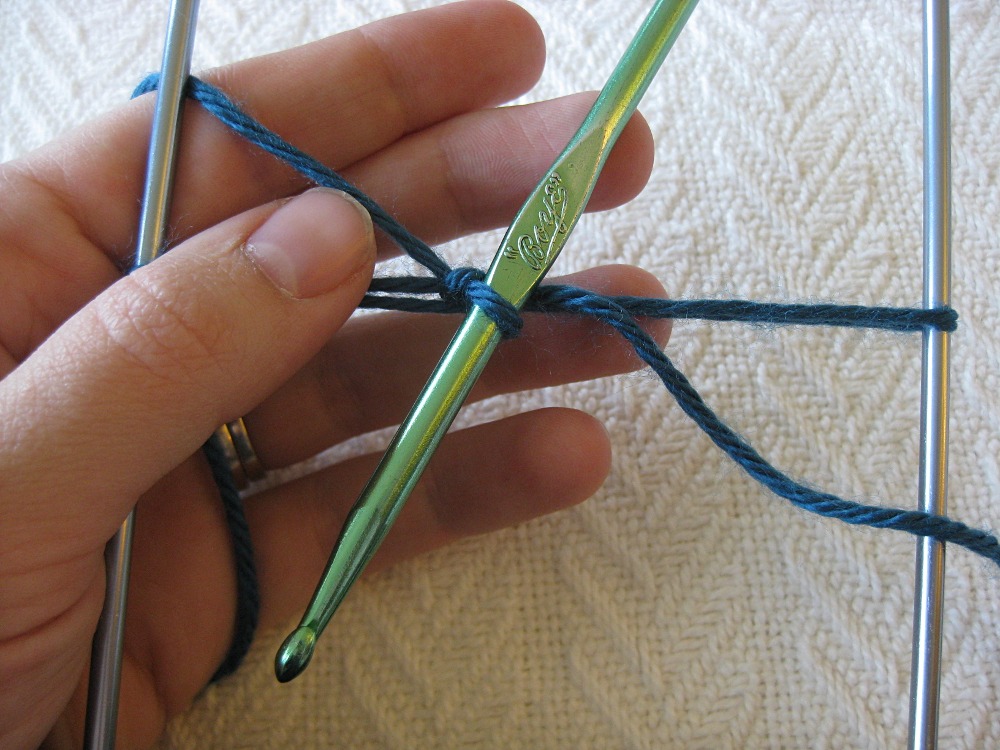
Next, flip the crochet hook to the back of the work (the hook will now be up, but on the back side). It’s a good idea to put a stitch marker or a loop of thread on the newly-formed loop on the right side. Now you have one loop on each side. It’s important to end up with the same number of loops on each side of your strip, so you will always know to finish a strip with this stitch marker in the front.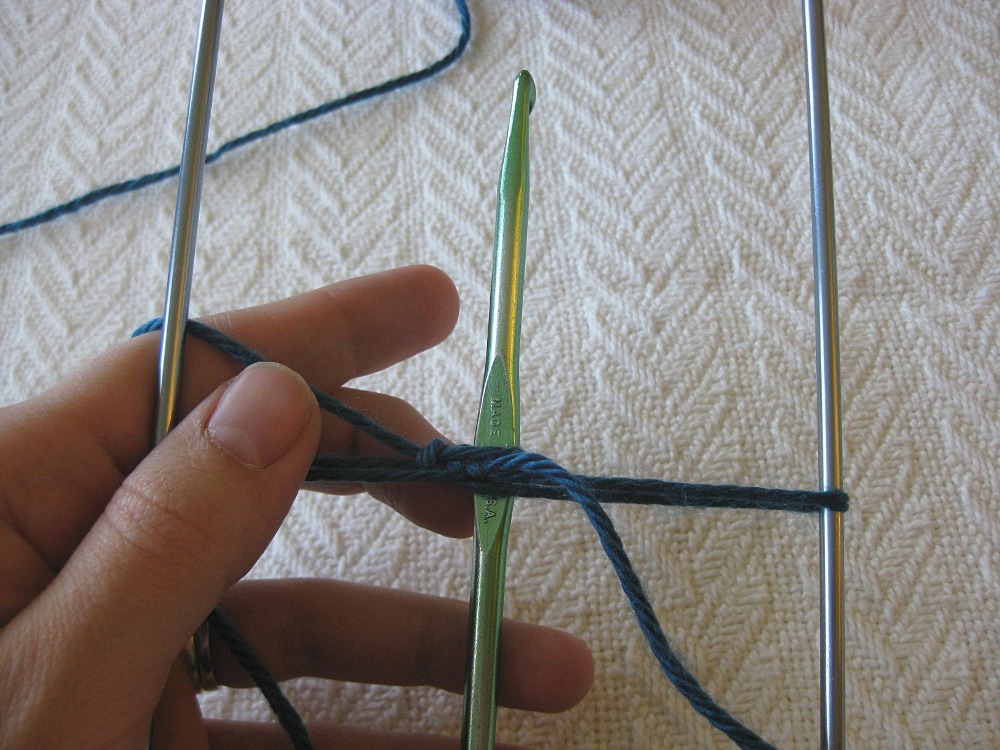
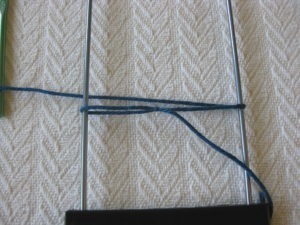
Turn the loom by moving the right side toward you, exactly the same way you did the first time. The hook will now be in the front of the work.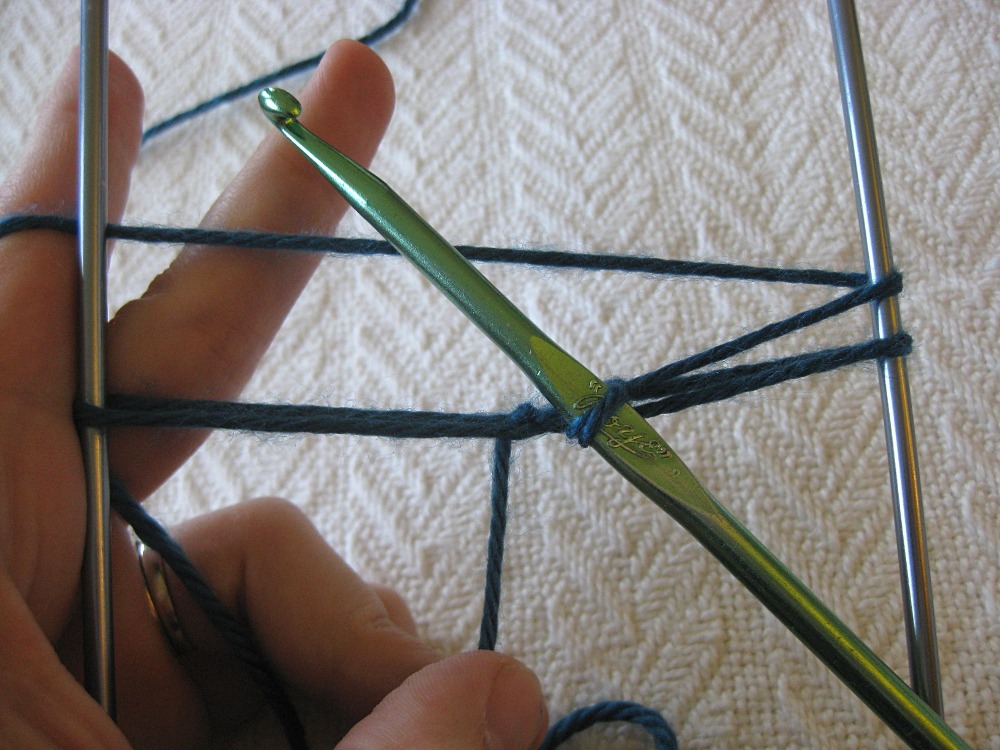
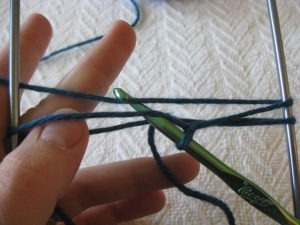
Insert your hook under the top loop on the left side (I use my left thumb to make it easier to see where to insert my hook, and for the first stitch it will be the only loop), grab the working yarn, and pull it through, yarn over and pull through both loops on your hook.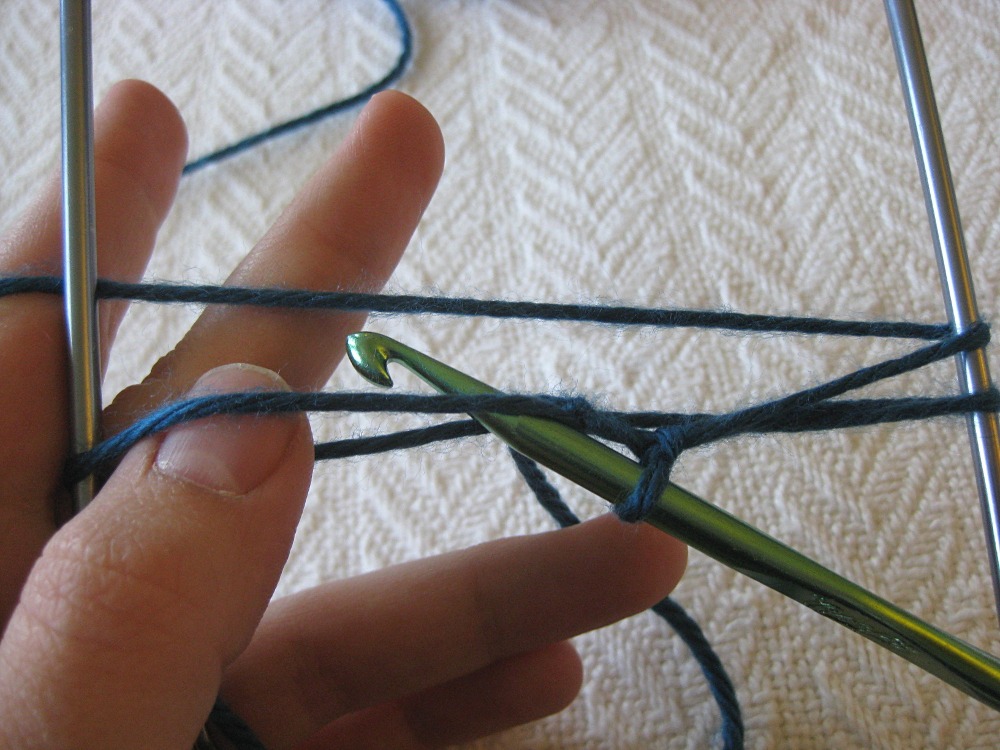
Repeat steps 6 and 7 until you have as many loops as your pattern calls for. To make it easier to count, I like to put stitch markers every 30 stitches or so. Also, don’t be afraid to scrunch up your stitches; you can definitely fit over 100 stitches on one loom! If you need to make a longer strip, unhook the bottom bar and slide the strip partway off, rolling it up as you go. Leave a few loops on the loom and put the bottom bar back on, then continue making the lace strip. If I need to do this, I like to slide the rolled-up lace strip into the bottom part of the loom so it doesn’t get hopelessly twisted while I finish the rest of the strip. When you’re done, remove the bottom bar and slide the strip of lace off the loom. I like to roll the strip up as I go to prevent it from getting twisted and tangled.
Joining Strips of Hairpin Lace
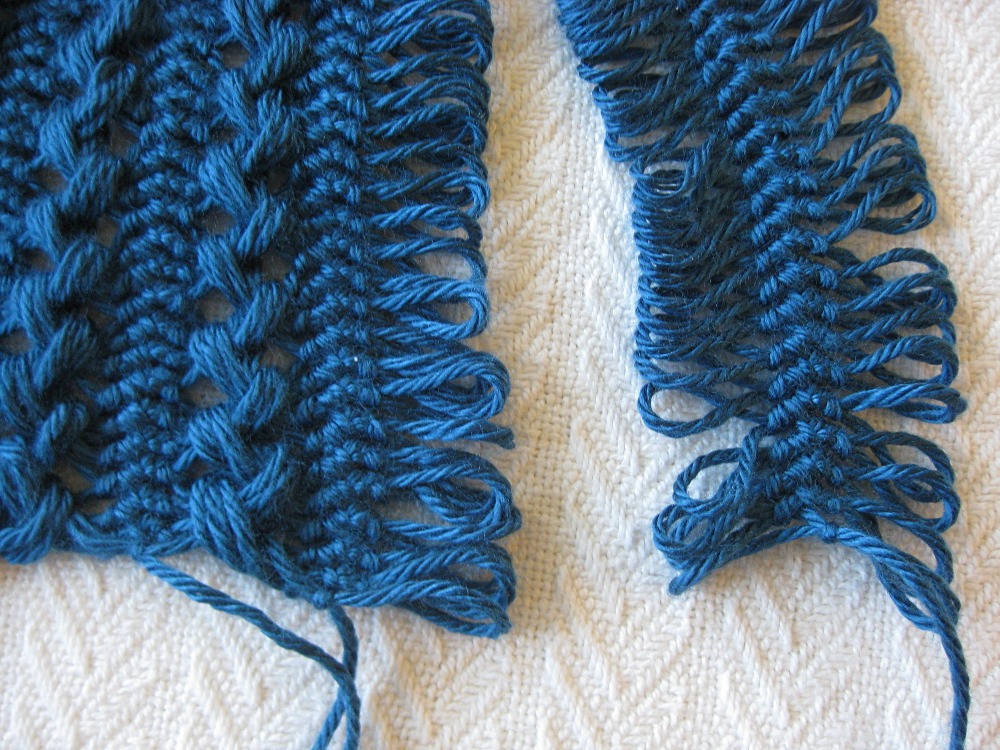
Lay two strips of lace side-by-side.
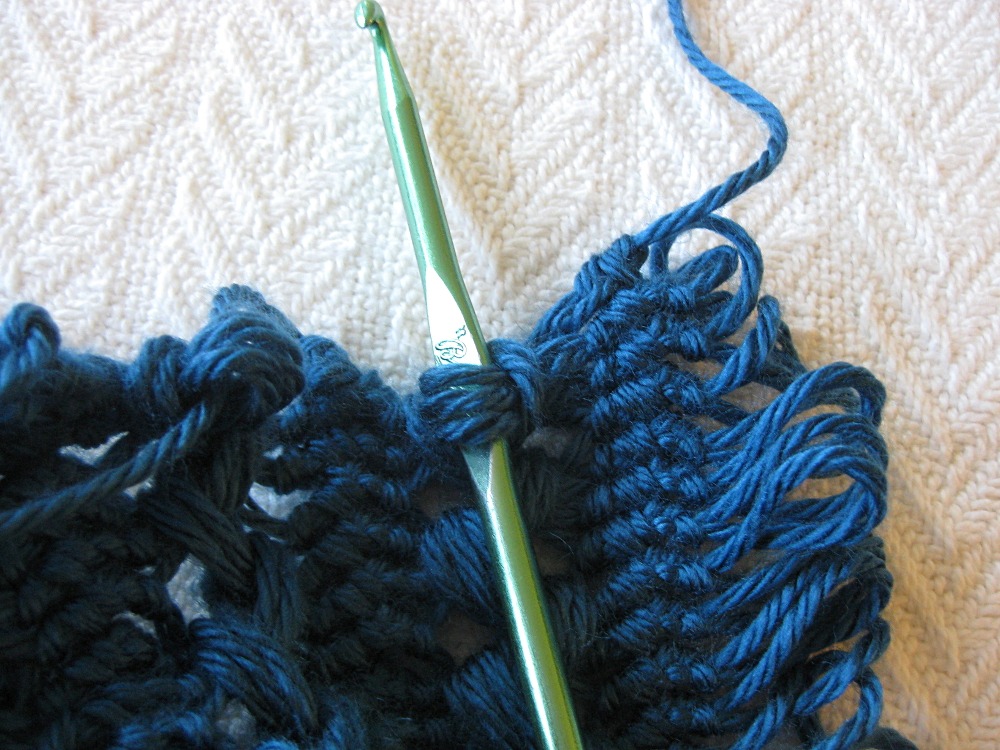
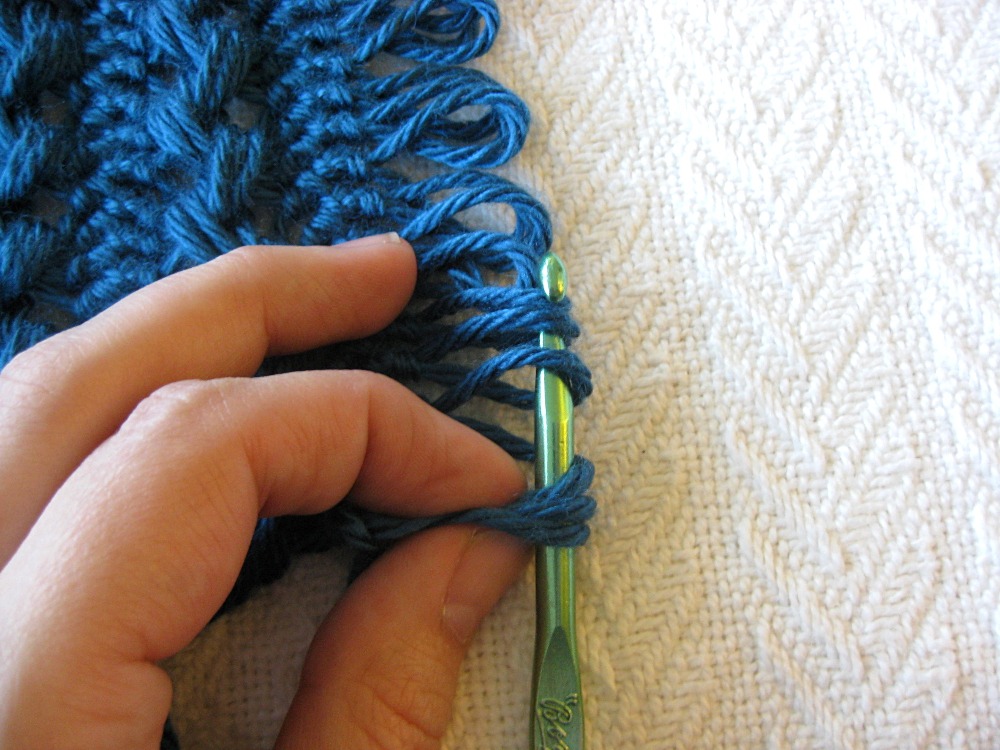
Insert your hook through the first three loops on one strip.

Hook three loops from the second strip and pull them through the loops on your hook.
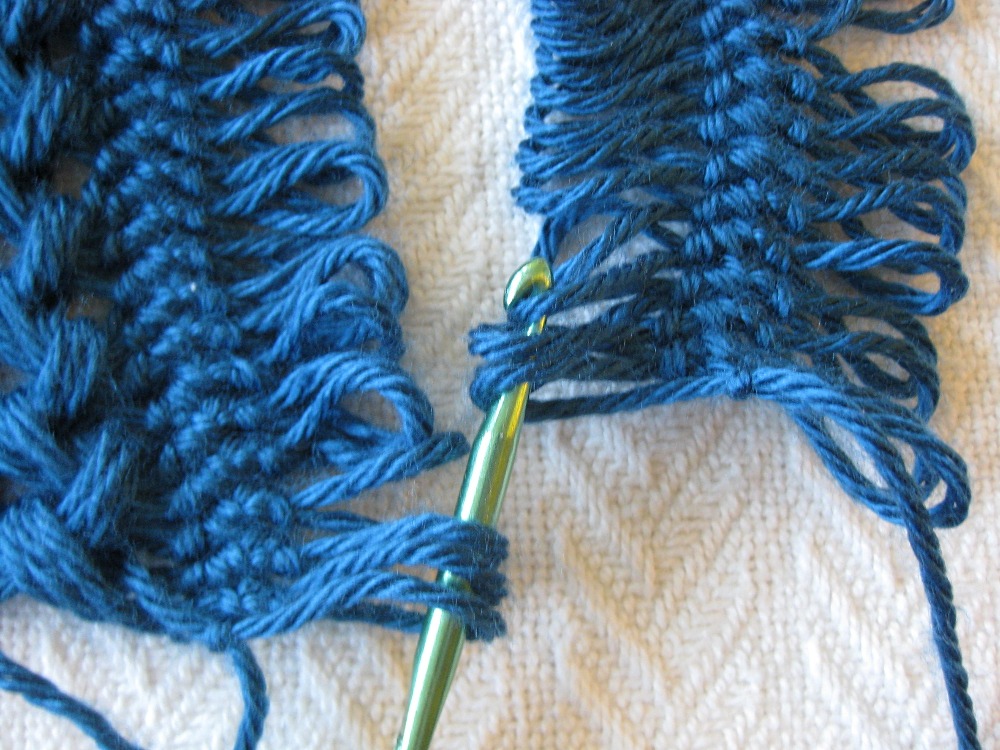
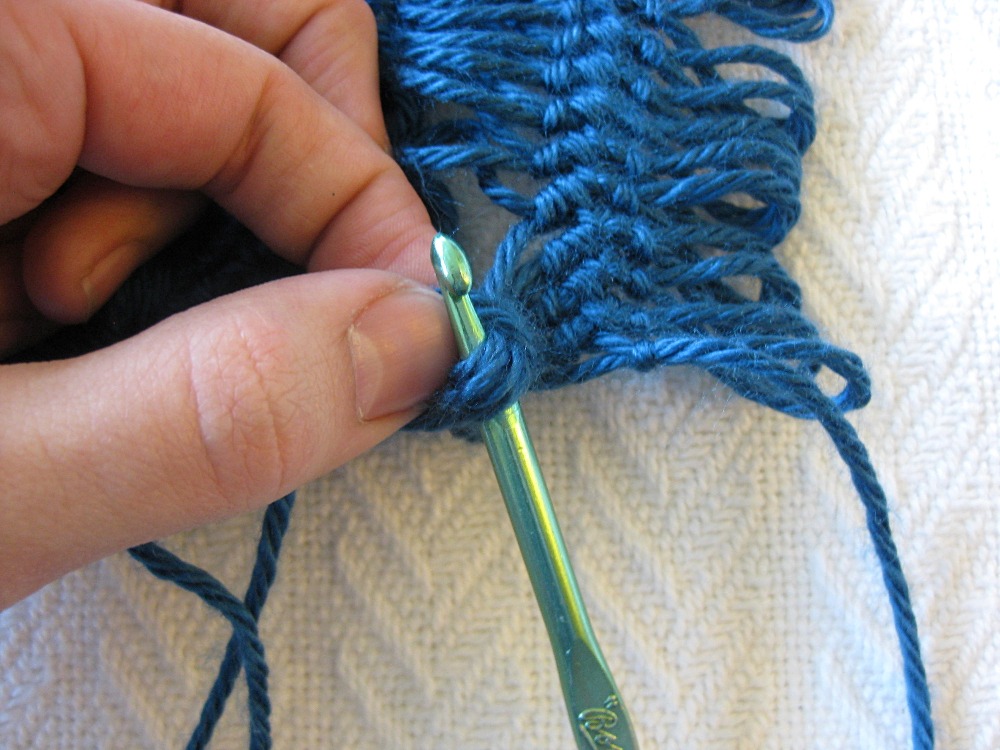
Hook three loops from the first strip and pull them through the loops on your hook.
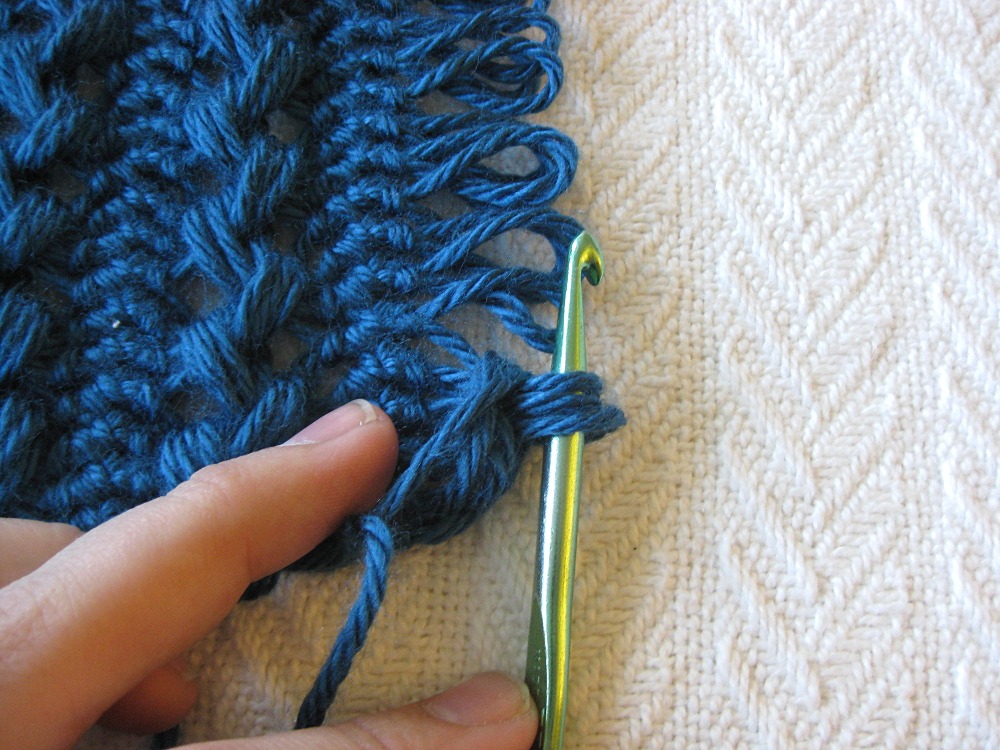
Continue in this fashion until you have used up all the loops. Voila! You’re done!

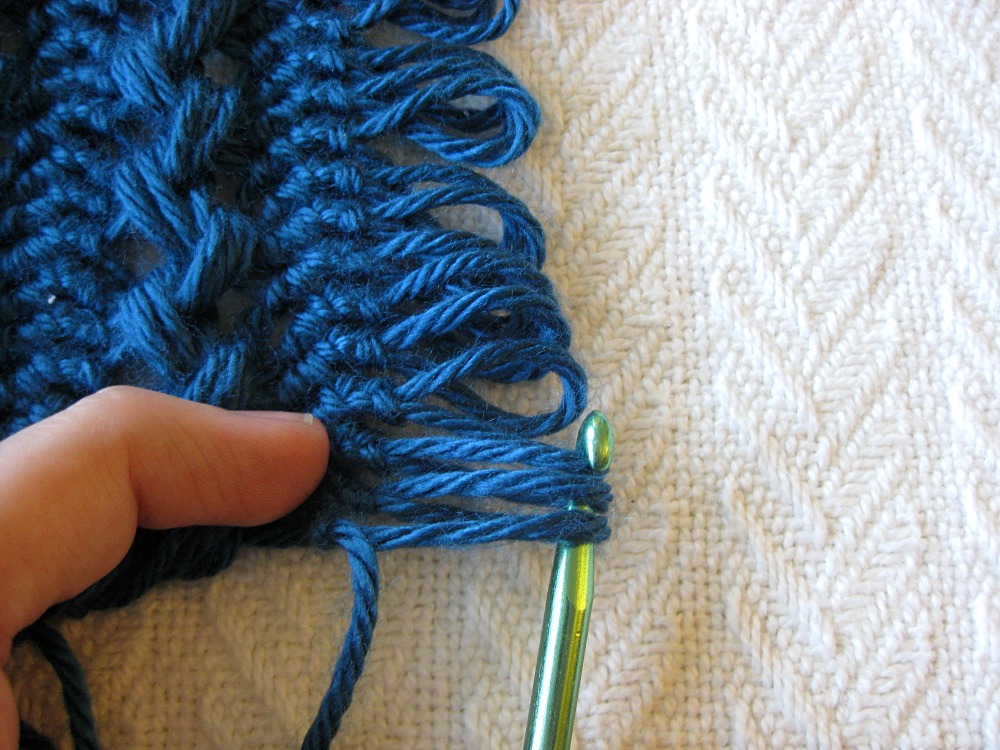
- To keep the strips from coming apart at the end, pull one of the yarn tails at the end of the strips through the last three loops on your hook (you can add a fringe or some edging later).
- If you’d like to finish the edging (though the loops are kind of fun and you’re welcome to leave them that way if you’d like), you can work the edges in the same way, by pulling through three loops at a time all the way up the side.
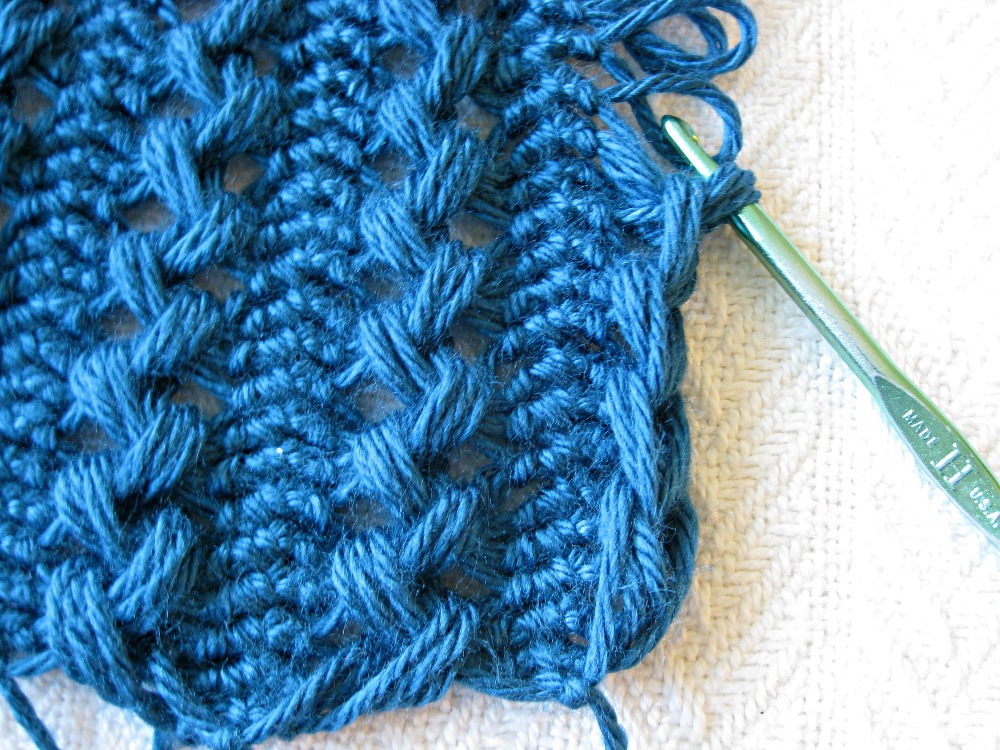
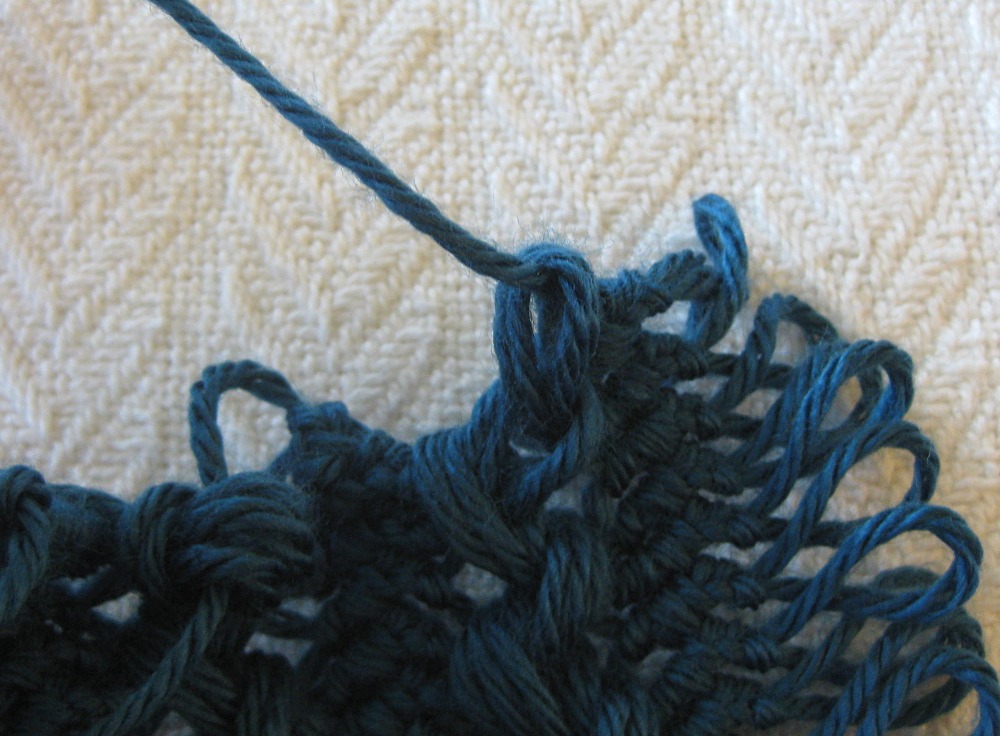
It’s also a good idea to periodically check the back of the project to make sure you haven’t missed any loops (it will be very obvious from the back), and make sure you alternate strips every time otherwise you will end up with an odd-looking gap in your fabric, and an angled edge. (See example, below, of gap).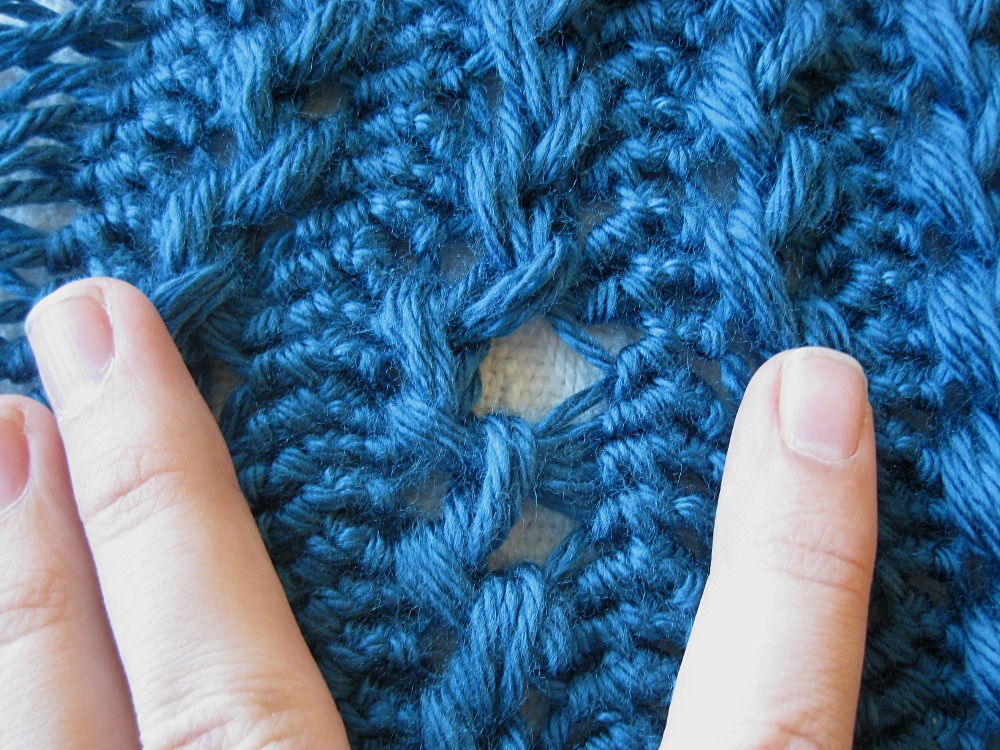
I hope you’ve found this tutorial helpful! Happy Crocheting!
This tutorial is also available as a PDF – sign up below!